At the 2018 Segmenting Symposium, I am going to do two rotations on SketchUp. The first is going to be for absolute beginners where I will work with the attendees to understand the user interface and how to use the seven tools that you will use for 90% of the work you do in SketchUp. We’ll learn the keyboard shortcuts and the tips and tricks that will help you ease the learning curve. Everything we do will use the FREE version of SketchUp.
The second session is for intermediate to advanced SketchUp users and will be targeted to segmented sculptures, integrating multi-generation laminations into segmenting and woodworking projects and photo-realistic rendering. In both of these sessions, you are welcome to bring your laptop but both classes are to be more of a demonstration than a hands-on classroom experience.
Anyone that has ever used SketchUp knows how valuable it is for modeling woodworking projects. There has been considerable debate about its usefulness for woodturning, though. I contend that it is indispensable for certain aspects of segmenting including such things as segmented sculptures and poly chromatic turning.
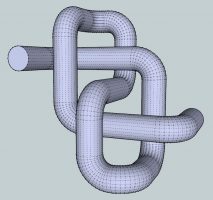
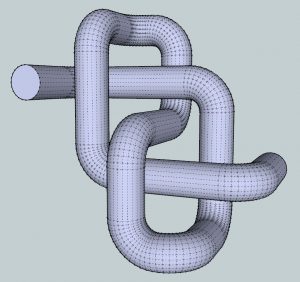
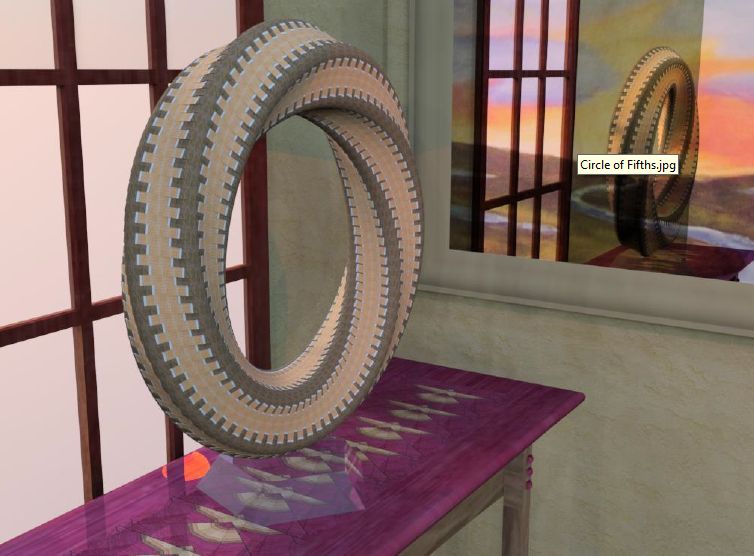
As an example, I’ll demonstrate how you can model a Figure 8 ‘orderly tangle’. I saw this sculpture at an art show made from solid wood and after taking some pictures of it, decided to model it in SketchUp. Here was my process:
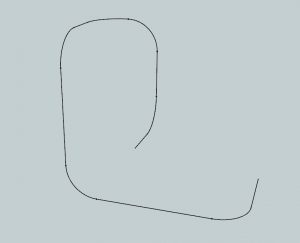
I began by using the line tool and an arc tool to create a path of half of the sculpture. It is a 3D drawing so a 2D picture of it does not give you a good perspective.
Next, to make a symmetric path, I duplicated this half and then inverted the geometry with a single command and connected the two halves. I then added a 4″ circular surface at one end of the path.
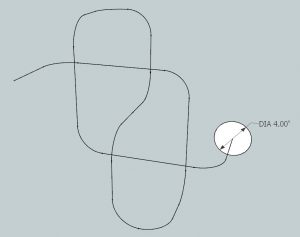
I then selected the entire path by triple-clicking it and then used the ‘Follow Me’ tool with the circular surface (again, a single click).
Zooming in and changing the viewport showed that in a couple areas, there was barely enough room for the pieces to be assembled without touching.
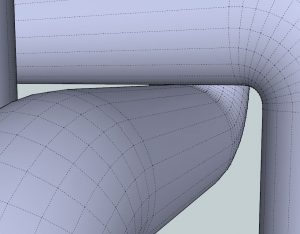
I decided to keep the dimensions of the completed sculpture, but reduce the disk from 4″ to 3″. The would considerably decrease the amount of wood required and make the assembly much simpler.
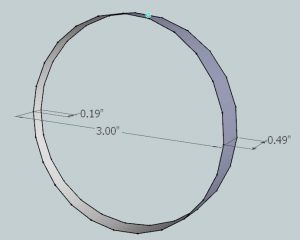
This sculpture has 11 straight sections which are simple to make. It also has 12 identical 90° corners, each made from 12 angled rings. By selecting one of those rings and measuring the width of the widest and narrowest parts and the exact width of the ring, a ring you make from segments can be compared to the measurements and if they are exactly the same, 12 of them will make a perfect 90 degree corner.
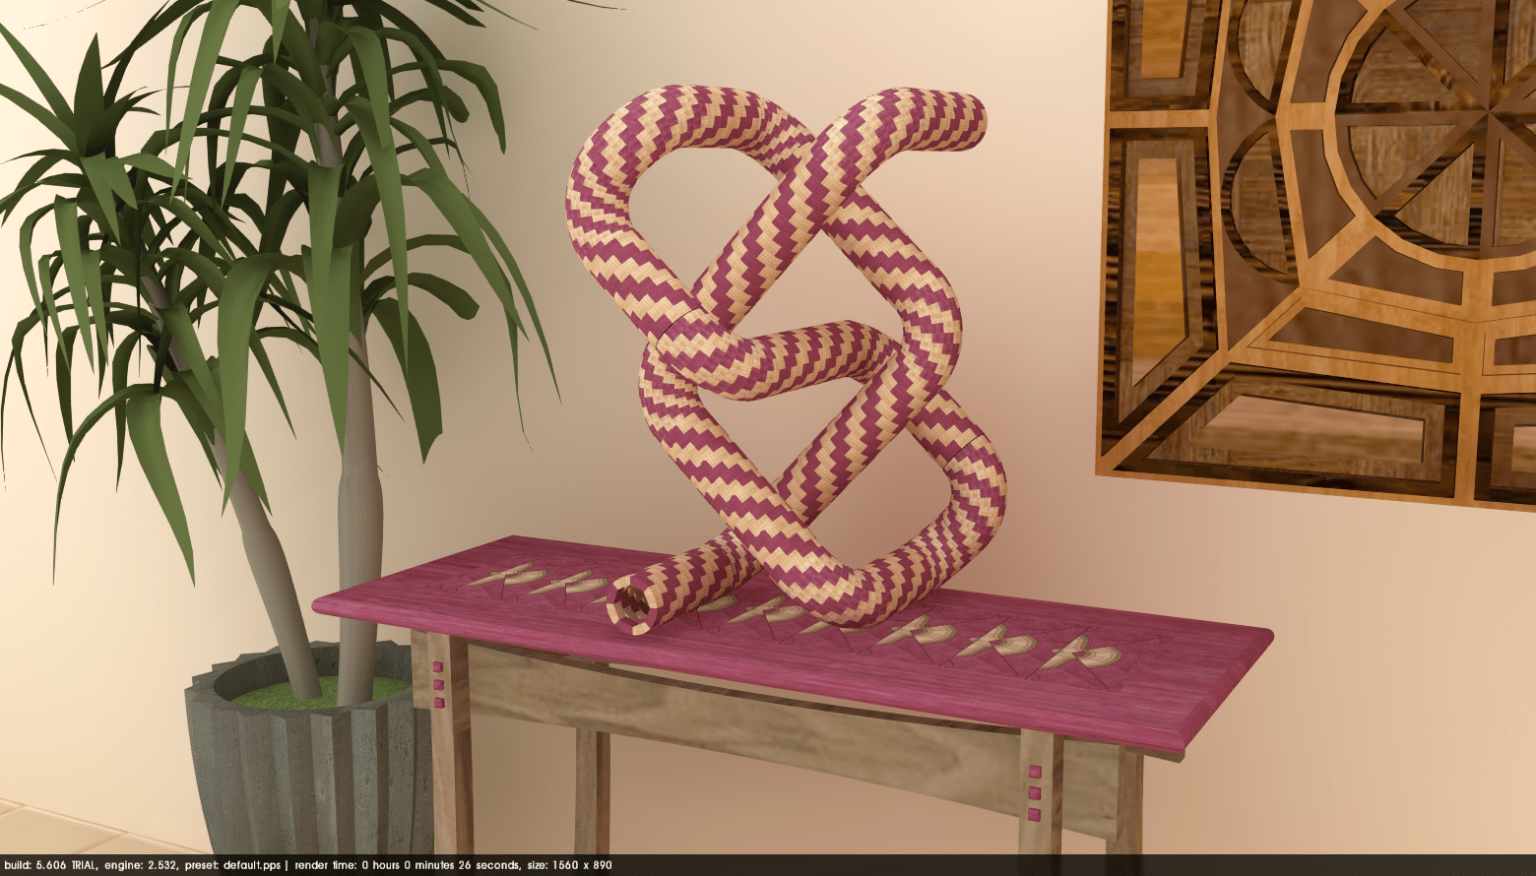
Modeling a segmented sculpture using SketchUp is a great way to see the finished result before ever stepping into the shop. Everything I have shown so far was done with just four tools – the line and arc tools to create a path, the circle tool to draw the disk and the Follow Me tool to extrude the disk along the path. Once you get a more skilled at SketchUp, you can create a model that can be rendered into a photo-realistic model such as the one shown below. If you are building this sculpture for someone, giving them this rendered model is a great way to make sure that there won’t be any surprises upon delivery.
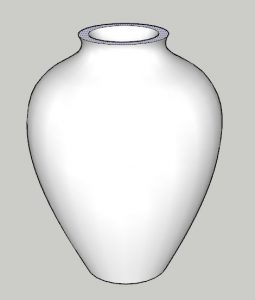
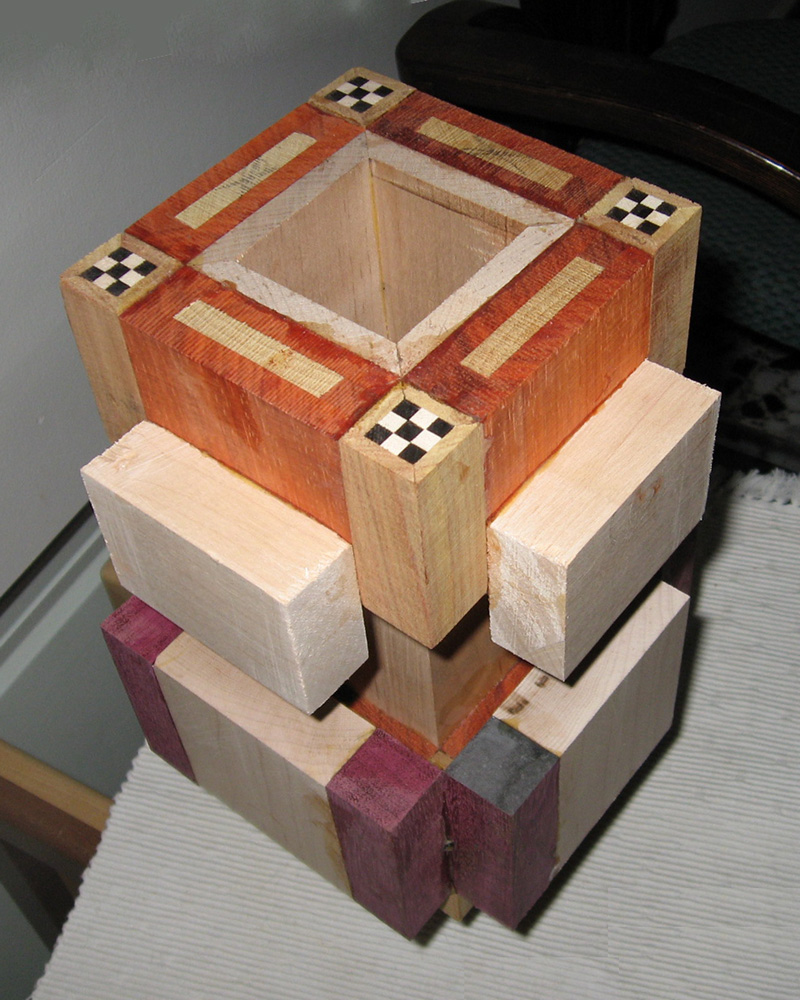
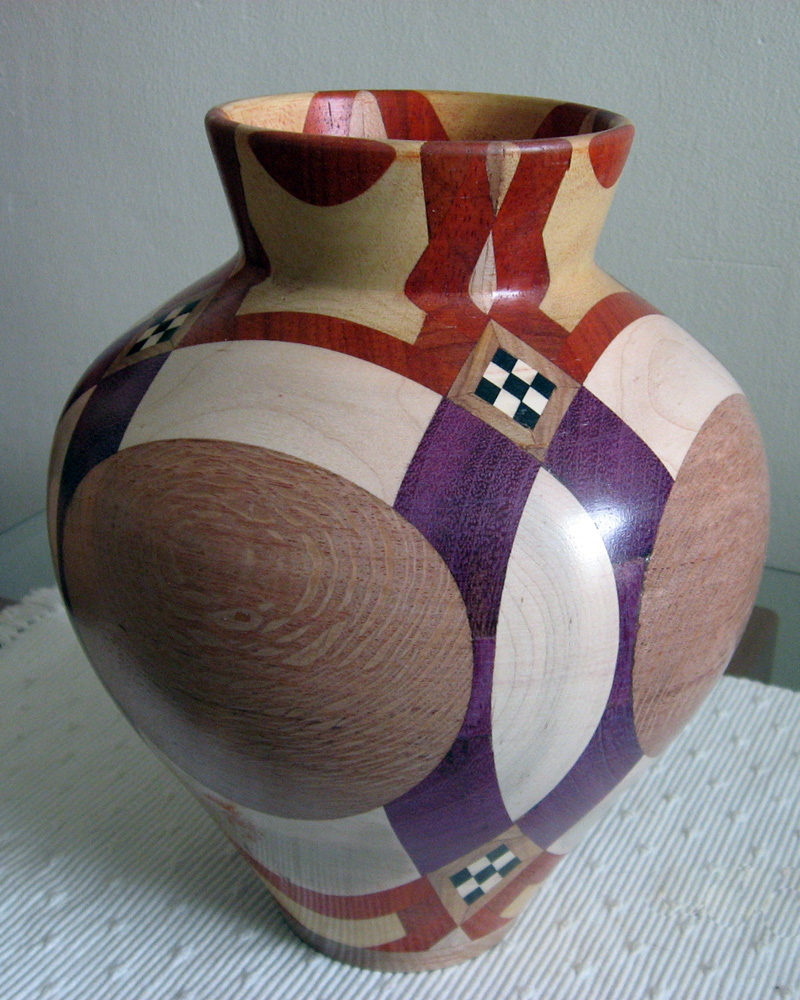
A polychromatic vessel is another one of those projects where it is difficult to visualize the completed vessel until you actually complete it. For example, let’s say you have a block of wood and a wall profile to make a vessel to turn from the block:
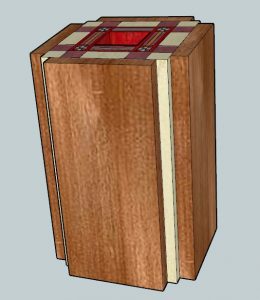
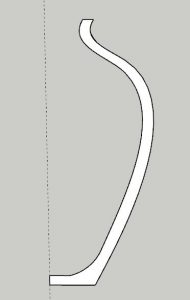
Draw a horizontal circle around the blue (or Z, or height) axis and us the Follow Me tool to rotate the profile along the path of the circle to form a vase:
Now, to intersect the vase with the wood block in SketchUp would take a long time and a big effort. Fortunately, SketchUp provides a simple solution named Projected Image that will make the task easy and quick. To use a projected image, you simply need to have a screenshot of the top of the block and then center it above (or below) the vase. To do this, draw a square of the exact size and import the image as a Texture into that square.
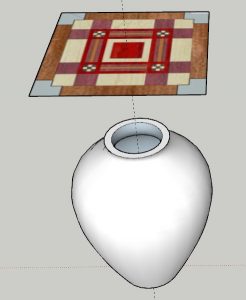
Finally, right-click on the image you imported and select Texture > Projected. Then, with the Paint Bucket tool, Alt-click the image to sample it to the tool and then click on the surfaces to be painted. This projects the image onto that surface. It is like passing the image through the vase and painting pixels of the model with the image wherever they intersect.
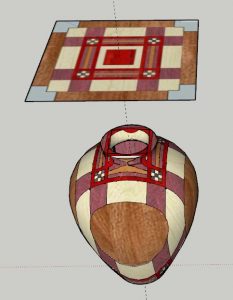
I sent a design to my friend Rafy Farchy in Israel who then made a block to match the design and then turned the vessel from it (completed bowl was from a different block):
In closing, I’ll show you a few more photo-realistic renderings to give you an idea of what you can do if you invest the time to learn SketchUp. The key is getting over the proverbial ‘software hump’ that is found in every piece of software, but is clearly a barrier to entry with SketchUp. The available resources on YouTube and other sites make getting over that hump far simpler than it has ever been.
First, a mobius made from angled pentagons (inspired by a turning from Malcolm Tibbetts). It is sitting on a model of a hall table I built using an eagle design from Lamination PRO.
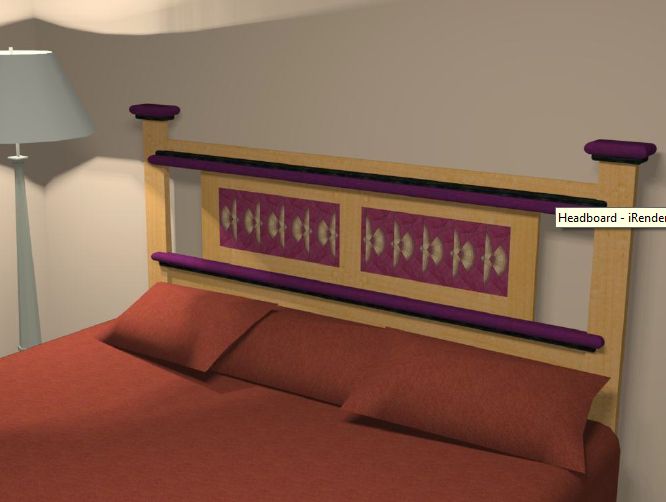
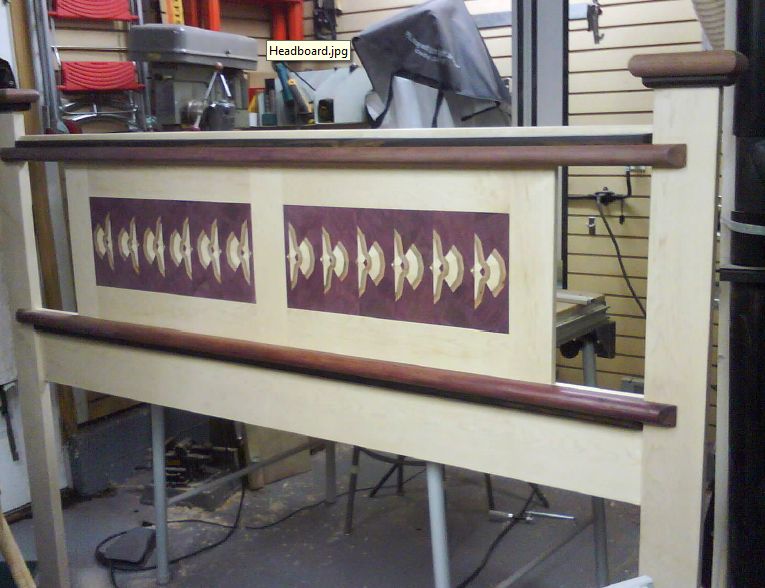
Next is a rendering of a headboard I promised I’d make for my wife 35 years ago which finally became a reality.
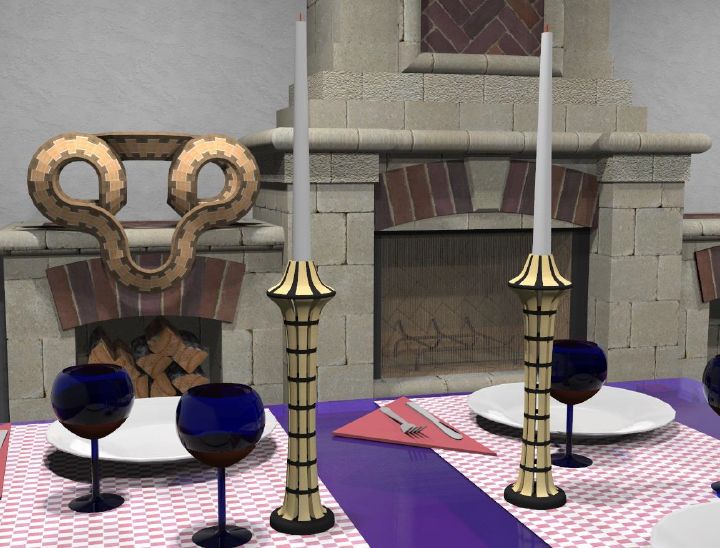
And finally, I modeled Dennis Kieling’s wonderful Skeleton candle holders. In the background, you’ll see my model of a ribbon turning with a design from Lamination PRO. My models are sitting on models downloaded from the 3D Warehouse, a repository of over 6 million models that you can freely use in any of your own drawings.
So if you are up for a good challenge or have tried and gave up learning SketchUp, give it a go and you will be glad that you persevered to get over the hump. Before you start, buy the book ‘SketchUp for Dummies’ and get to know what tutorial creators on YouTube have the largest following.
You can do this and when you’re done, you’ll be glad you did.
Lloyd,
This is really interesting. Thanks! I will be attending the symposium and will attend your demonstrations. Question – what version of sketchup to you recommend?
Dave
Dave,
Everything I show here has been done using the Free version. In my opinion, the value of the paid version for woodworkers/woodturners is the ability to print templates to their exact size. This is done by transferring the design from SketchUp to the program that comes with the paid version which is named Layout. This is the software that you can use to create architectural drawings on multiple pages of any size.
I do use this often as I’ll create full-size templates which I upload to a printer such as Kinkos where they are printed on as large of paper as is necessary and then I cut them out and paste them onto plywood which then becomes my construction template.
The good news is that there are other ways to accomplish this that require a couple additional steps but saves you from paying the cost of the paid version (now over $500). I’ll be demonstrating this technique at the intermediate/advanced rotation.
Cool! Thanks, Lloyd! Looking forward to St. Louis!! I’ll also be in Portland for the AAW symposium. Maybe we will see you there.
If some one needs to be updated with latest technologies then he must be
pay a quick visit this site and be up to date daily.